Fresh drywall can completely change how a room looks and feels. Whether you’re finishing a basement, remodeling a kitchen, replacing damaged walls, or building a new room, properly installed drywall creates the foundation for a clean, finished interior.
But hanging drywall involves more than attaching panels to wall studs. Panel selection, accurate measurements, fastener placement, joint alignment, and finishing techniques all influence the final result. Small mistakes during installation can lead to visible seams, cracks, uneven surfaces, and unnecessary repairs.
Homeowners considering drywall hanging services in Raleigh, NC should understand what the process involves before starting a project. Knowing what to expect makes it easier to plan a realistic budget, prepare the space, and choose qualified professionals.
This guide covers drywall materials, installation methods, project costs, common mistakes, and practical tips for achieving long-lasting results.
What Is Drywall Hanging?
Drywall hanging is the process of installing gypsum panels over wall studs, ceiling joists, or other approved framing systems to create interior wall and ceiling surfaces.
Drywall panels typically consist of a gypsum core covered with a durable facing material. They provide a smooth base for joint finishing, primer, paint, and other decorative treatments.
Drywall is widely used in residential construction because it’s relatively affordable, versatile, and easier to install than traditional plaster systems.
A complete drywall project usually involves two main stages:
- Hanging: Measuring, cutting, positioning, and fastening drywall panels to the framing.
- Finishing: Applying joint tape and compound, sanding, and preparing the surface for painting.
These stages require different techniques, but both are essential to the final appearance.
Properly installed drywall should feel solid, have securely fastened panels, and provide a consistent surface without obvious gaps or misaligned joints.
When Do Homeowners Need Drywall Hanging Services?
Drywall installation is common in both new construction and home improvement projects.
Home remodeling projects
Kitchen, bathroom, and living room renovations often involve removing existing wall materials to update plumbing, electrical wiring, insulation, or room layouts.
Once the underlying work is complete, new drywall creates the finished wall surface.
Basement finishing
An unfinished basement may have exposed framing, insulation, or concrete walls.
Drywall can help transform the space into a home office, entertainment room, guest bedroom, or additional living area.
However, moisture problems should be resolved before installing new wall materials.
Ceiling replacement
Water damage, structural repairs, or major renovations may require removing and replacing ceiling drywall.
Ceiling installation often requires additional support equipment because panels must be lifted and held securely while being fastened.
Room additions
New bedrooms, home offices, and expanded living spaces need interior walls and ceilings.
Drywall installation typically takes place after framing, required inspections, and rough-in work are completed.
Extensive wall damage
Large holes, widespread cracking, or deteriorated drywall may make panel replacement more practical than repeated patching.
A professional can determine whether localized repairs or new drywall installation is appropriate.
Different Types of Drywall and Where They’re Used
Choosing the right drywall is important because different rooms have different moisture, durability, and fire-resistance requirements.
Standard drywall
Standard drywall is commonly used in bedrooms, living rooms, hallways, and other dry interior spaces.
It’s available in several thicknesses and panel sizes.
The appropriate thickness depends on framing spacing, wall or ceiling requirements, and applicable building standards.
Moisture-resistant drywall
Moisture-resistant panels are designed for areas that experience higher humidity, such as certain bathroom and laundry room locations.
However, moisture-resistant drywall isn’t waterproof.
Areas exposed to direct water, such as shower surrounds, generally require an approved tile backer or another suitable substrate.
Mold-resistant drywall
Mold-resistant products use specially designed facings or other materials to help reduce susceptibility to mold growth.
They can be useful in appropriate locations, but they don’t eliminate the need for moisture control.
Leaks, condensation, and poor ventilation must still be addressed.
Fire-resistant drywall
Certain drywall products are designed and tested for use in fire-resistance-rated wall and ceiling assemblies.
Type X drywall is commonly associated with these applications.
However, using a fire-resistant panel alone doesn’t automatically create a rated assembly. The complete construction must meet the relevant tested design and code requirements.
Sound-control drywall
Some drywall products are engineered to help reduce sound transmission between rooms.
They may be useful in home theaters, bedrooms, offices, and shared walls.
Actual acoustic performance depends on the entire wall assembly, including framing, insulation, sealing, and installation methods.
How Professional Drywall Hanging Works
Understanding the installation process helps homeowners know what to expect and why each step matters.
Step 1: Inspecting the framing
Before hanging drywall, the installer checks the framing for alignment, stability, and appropriate spacing.
Uneven studs or ceiling joists can create visible irregularities in the finished surface.
Any required electrical, plumbing, insulation, or framing inspections should be completed before the walls are covered.
Step 2: Measuring and planning panel placement
Accurate measurements reduce waste and help installers position joints correctly.
Professionals plan panel orientation, openings, and seams before cutting materials.
The layout should account for doors, windows, electrical boxes, and other penetrations.
Step 3: Cutting drywall panels
Drywall panels are measured and cut to fit the room.
Straight cuts are commonly made by scoring and snapping the panel, while specialized tools may be used for openings and irregular shapes.
Precise cutting helps maintain proper clearances and reduces unnecessary gaps.
Step 4: Hanging the panels
Installers position drywall panels against the framing and secure them using approved fasteners.
Fastener type, spacing, and placement depend on the panel, framing, and applicable installation requirements.
Screws should hold the drywall securely without tearing through the facing material.
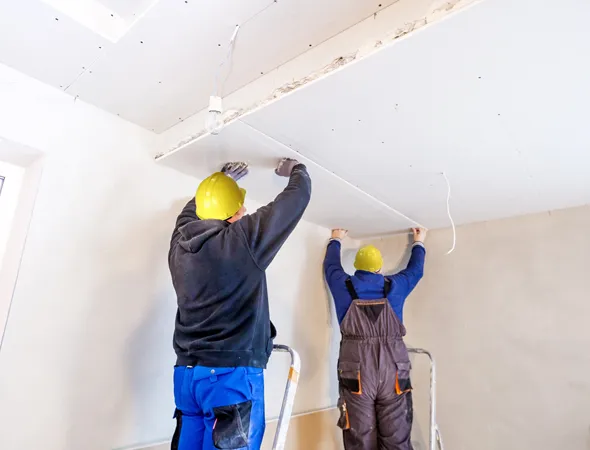
Ceiling installations may require mechanical lifts or additional workers to position large panels safely.
Step 5: Taping and finishing the joints
Once the panels are installed, joints and fastener locations are finished using appropriate tape and joint compound.
Multiple coats may be required to create smooth transitions between panels.
Each coat needs sufficient drying or setting time before additional work begins.
Step 6: Sanding and surface preparation
After the compound has dried, the finished areas are sanded to remove imperfections.
The surface is then inspected for uneven joints, visible fasteners, and other defects.
Dust should be controlled and removed before primer is applied.
Step 7: Final inspection
The completed drywall should be checked under suitable lighting.
The installer looks for visible seams, surface irregularities, damaged corners, and other issues that may affect painting.
Any necessary touch-ups should be completed before the next finishing stage.
How Much Does Drywall Hanging Cost in Raleigh, NC?
Drywall installation costs depend on the size of the project, the type of material, labor requirements, and the level of finishing requested.
A straightforward installation in an open room may cost less per square foot than a project involving high ceilings, unusual angles, or extensive cutting.
Several factors influence the final estimate.
Project size: Larger projects require more materials and labor, although some fixed costs may be spread across a greater area.
Drywall thickness and type: Specialty panels designed for moisture resistance, sound control, or fire-rated assemblies may cost more than standard drywall.
Wall and ceiling height: Tall walls and ceilings may require scaffolding, lifts, or additional workers.
Finishing requirements: A smooth, paint-ready finish generally involves more labor than simply hanging panels.
Existing wall removal: Demolition, debris disposal, and repairs to damaged framing can increase costs.
When comparing estimates, confirm whether the price includes materials, hanging, taping, sanding, priming, painting, and cleanup. These services aren’t always included in one quote.
Common Drywall Installation Mistakes to Avoid
Drywall may look simple to install, but small errors can become noticeable after painting.
Using the wrong drywall material
Standard drywall isn’t suitable for every location.
Moisture-prone areas, certain garage assemblies, and rooms with specific sound-control requirements may need different products or construction methods.
Selecting materials before reviewing the room’s requirements can lead to unnecessary replacement later.
Poorly positioned joints
Improperly planned seams can make finishing more difficult and increase the risk of visible imperfections.
Installers should follow manufacturer guidance for joint placement and fastening patterns.
Incorrect fastener installation
Screws driven too deeply can damage the drywall facing and reduce holding strength.
Fasteners left protruding can create visible bumps after finishing.
Proper depth and spacing help keep panels securely attached.
Skipping surface preparation
Uneven framing, unresolved moisture problems, and incomplete electrical work can create complications after drywall installation.
Correcting these conditions before covering the framing is generally easier and less expensive.
Rushing the finishing process
Joint compound needs adequate drying or setting time.
Applying additional coats too quickly can lead to poor adhesion, cracking, or surface irregularities.
Careful finishing is particularly important in rooms with strong natural or directional lighting.
Should You Install Drywall Yourself or Hire a Professional?
DIY drywall installation may be manageable for experienced homeowners working on small, straightforward projects.
However, full-room installations and ceiling work require careful planning, physical effort, and specialized finishing skills.
Large drywall sheets can be heavy and difficult to maneuver. Ceiling installation also presents additional lifting and fall hazards.
Professional installation may be a better choice when a project involves multiple rooms, high ceilings, specialty materials, or demanding finishing requirements.
Hiring a drywall hanging contractor Raleigh NC homeowners can evaluate through previous work, references, and detailed estimates can also make project planning easier.
Before hiring, ask whether the contractor handles both hanging and finishing, how the work area will be protected, and what level of surface finish is included.
How to Prepare Your Home for Drywall Installation
A little preparation can help prevent delays and protect your belongings.
First, remove furniture, decorations, and fragile items from the work area whenever possible.
Next, confirm that electrical, plumbing, insulation, and framing work is complete. Any required inspections should be finished before drywall covers the walls.
Discuss dust protection with the contractor, especially when work takes place in an occupied home.
Drywall cutting and sanding can create significant dust, so nearby rooms, vents, and belongings may need protection.
Finally, confirm access arrangements, material storage, cleanup responsibilities, and the expected project schedule.
These details help establish clear expectations before installation begins.
Why Consider Very Handy Wall and Ceiling Repairs?
Local service provider: Very Handy Wall and Ceiling Repairs
Very Handy Wall and Ceiling Repairs serves homeowners in Raleigh, NC, with drywall installation and repair, ceiling restoration, plaster repairs, and surface finishing.
The company has experience with projects involving damaged drywall sections, basement walls, ceiling repairs, and blending repaired surfaces with surrounding finishes.
For homeowners seeking drywall hanging services in Raleigh, NC, discussing the project scope with a local specialist can help clarify material requirements, finishing expectations, and the work involved.
Whether you’re replacing damaged wall sections or preparing a room for renovation, ask about panel installation, joint finishing, texture matching, and cleanup before approving the estimate.
Frequently Asked Questions
1. How long does it take to hang drywall in a room?
Hanging drywall in a typical room may take several hours to a day, depending on its size, layout, and complexity. Taping, applying joint compound, drying, and sanding usually require additional time. Larger projects and complicated ceilings may take longer.
2. Can new drywall be installed over existing drywall?
In some situations, new drywall can be installed over an existing surface. However, the underlying wall must be sound, dry, and capable of supporting the additional material. Electrical box depth, trim, fastener requirements, and applicable building codes must also be considered.
3. What drywall thickness is best for residential walls?
Half-inch drywall is common for many residential wall applications. However, some assemblies require different thicknesses based on framing spacing, fire-resistance requirements, and manufacturer specifications. Ceilings may also require specific panel types or thicknesses to prevent sagging.
4. Does drywall installation include painting?
Not necessarily. Some contractors provide hanging and finishing only, while others also offer priming and painting. Always confirm which services are included in the written estimate. A finished drywall surface generally needs appropriate primer before painting.
5. Can drywall be installed after water damage?
Yes, but the moisture source must be corrected first. Damaged materials should be evaluated, and the affected area must be properly dried before new drywall is installed. Covering damp framing or insulation can allow moisture-related problems to continue behind the finished wall.
Conclusion
Proper drywall installation creates the foundation for attractive, durable interior walls and ceilings. From choosing the right materials to securing panels and finishing joints, every stage affects the final result.
For Raleigh homeowners, understanding the installation process makes it easier to plan renovations, compare estimates, and avoid common mistakes.
If you’re planning a remodeling project or replacing damaged drywall, Very Handy Wall and Ceiling Repairs can help you discuss the work required and determine the next steps.