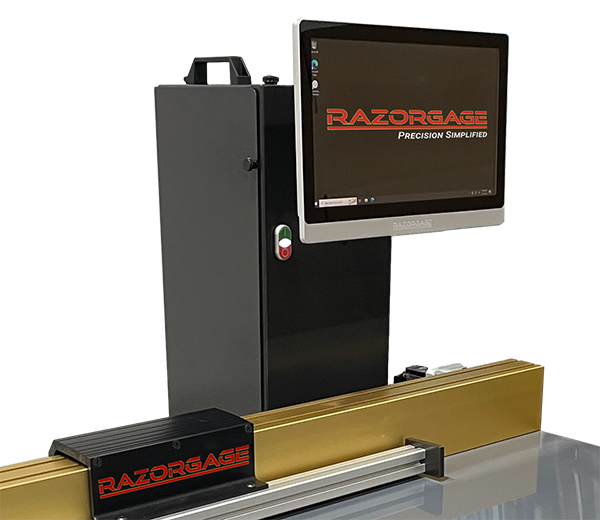
Last spring, I stood at my chop saw at 6:40 a.m., recalculating the same cut list for the third time. Two drawer-box sides were already in the scrap bin. That morning I decided to try a programmable saw stop.
I’d read plenty about digital positioning technology. I wanted to know if it would actually help a working furniture shop. Here’s my honest story, mistakes included.
My Problem: Tape Measures, Stop Blocks, and Expensive Remakes
We build custom cabinets and furniture with a small crew. Every cut came down to a tape measure, a pencil mark, and a clamped stop block.
It worked, until it didn’t. Here’s what I kept running into:
- Repeat parts that drifted by a hair after a few dozen cuts
- Operators who read the tape differently
- Time lost moving the stop between cut lengths
- Remakes that ate the profit on small jobs
I wasn’t losing money on one big mistake. I was losing it in a hundred small ones.
Why I Chose a Programmable Saw Stop
I looked at a few options, but I kept coming back to a digital positioner. The idea is simple. You enter the length, and a motor-driven stop moves to that exact spot. You don’t measure or nudge anything.
What Digital Positioning Actually Changes
Once I understood precision length control, the appeal made sense. The machine removes the human guesswork. It’s written about for door and window work, but the logic applies just as well to face frames and furniture parts.
I went with the RG3 positioner because it fit the saw I already owned.
Why I Didn’t Just Buy a New Saw
Replacing the saw wasn’t in the budget. Upgrading the stop gave me most of the benefit for a fraction of the cost. For small and growing shops, that matters.
My Step-by-Step Setup Walkthrough
Here’s how it went for me:
- Mounted the positioner and checked that the fence was square. I skipped a proper check at first, and I regret it (more below).
- Calibrated the stop against a known length.
- Entered one simple cut list to test it with scrap.
- Ran a batch of identical drawer parts and measured every fifth piece.
- Trained two operators, which took less time than I expected.
Mistakes I Made With My Programmable Saw Stop
I made a few mistakes, and they’re worth passing on.
Mistake 1: Skipping calibration checks. My first batch was off by the same small amount on every piece. That wasn’t the machine’s fault. I hadn’t calibrated carefully. Following the calibration guide fixed it in minutes.
Mistake 2: Blaming the stop for a saw problem. A dull blade and a loose fence caused errors I wrongly pinned on the positioner. I covered this in a separate post, how to get more accuracy from your cutting equipment.
Mistake 3: Ignoring angle work. Length was now handled, but my miters were still inconsistent. A good stop doesn’t fix a poorly set blade angle. I found it useful to read how others improve miter cut accuracy. I also wrote up my thoughts on whether the Angle master Razor Gage Angle master is the right saw for angle cutting in another post.
The Next Bottleneck: Material Feeding
Once the stop was accurate, my slowest step became handling the stock. My operator spent more time pushing boards than cutting them.
That led me to look at automating material feeding. I later explored the auto pusher system for exactly this reason. A programmable saw stop and automated feeding work best as a pair.
My Results After 90 Days
I tracked three things: remakes, time per cut list, and operator fatigue. Here’s what I saw:
- Remakes dropped sharply. Repeat parts matched from the first piece to the last.
- Cut lists moved faster. No more tape reading or stop-block shuffling.
- New hires got productive sooner. Less skill was needed to hit the right length.
The biggest surprise was the labor effect. I explain why a saw measuring system saves time and money.
<!– IMAGE PLACEHOLDER: Before/after chart of remakes per month –>
Who Should Consider a Programmable Saw Stop?
From my experience, it makes the most sense if you are:
- A cabinet shop or custom millwork shop running repeat parts
- A furniture manufacturer or face frame producer with tight tolerances
- A shop owner or production manager trying to cut waste and labor
- A small or growing shop that wants capacity without buying a whole new line
If you’re shopping for an upcut saw, the Cyclone 600 upcut saw is worth a look.
Frequently Asked Questions
What is a programmable saw stop?
It’s a motorized stop that moves to a length you enter, replacing manual measuring and stop blocks.
Will it fit my existing saw?
Often yes. Fit depends on your saw and fence, so check compatibility before buying.
How much does it improve furniture manufacturing efficiency?
In my shop, the gains came from fewer remakes, faster cut lists, and less operator fatigue.
Does it help with miter cuts?
It controls length, not blade angle. For miters, pair it with a solid angle setup.
Is it worth it for a small shop?
For me, yes. Repeat work paid it back quickly, though your volume matters.
Conclusion
A programmable saw stop didn’t make my shop perfect, but it removed my biggest source of repeat errors. If tape measures and stop blocks are costing you time and material, it’s worth a serious look.
Contact Us
Ready to talk through your own setup? Contact the RazorGage team:
- Address: 57006 241st Street, Ames, IA 50010
- Phone: 515.232.3188
- Email: sales@RazorGage.com