
The Melted Line – An Invisible hairline That Looks Like a Witch’s Curse, but is all about the technique. Making a lace frontal your perfect go-to for everything – Custom units to building from scratch! Whether you have a full lace unit or you are assembling an installation from scratch, you can’t deny a Lace Front is able to do the MOST when it comes to providing you a believable 5-ear-to-ear melt that looks totally natural. However, thanks to a frontal’s ability to replicate the real hair’s appearance, a small error in pre-laying or in application will turn everything into a mess.
If you have ever dealt with a lifting edge, an unnatural grey cast, or sudden shedding, you are not alone. Installing frontal hair requires patience and the right methods. In this guide, you will learn the most common installation mistakes, how to fix them, and expert-level strategies to keep your lace frontal looking fresh without damaging your natural hair.
1. Improper Cap Preparation and Scalp Protection
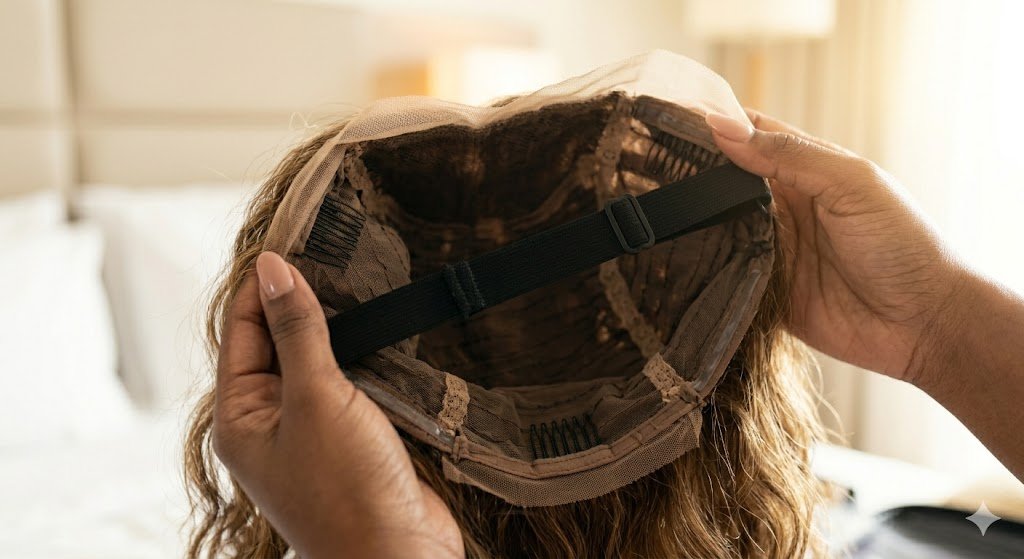
A beautiful installation does not begin when lace hits your scalp. Failure to prepare your scalp or fumbling with your stocking cap setup is one main reason for lift and irritation to the skin.
Neglecting Scalp Cleansing
When glues, tapes, or gels are placed over greasy skin or product residue, the adhesive fails to bond appropriately.
- The Mistake: Placing adhesive directly onto sweat, natural skin oils, or makeup.
- The Fix: Wash down your hairline with 90% Isopropyl Alcohol or any skin-safe cleanser in order to clean any oil and dirt off. Once you have cleaned down there, you always want to use a skin protectant barrier spray to avoid irritating your skin with your adhesive.
Choosing the Wrong Stocking Cap Tone
The “bald cap method” creates the Illusion of a continuous scalp beneath your lace.
- The Mistake: Using a cap that is much lighter or darker than your true skin tone.
- The Fix: Choose a cap to blend with your skin tone with soft hair. Draw the makeup (which would either be liquid foundation or powder) that exactly matches your tone on the top of your cap in order to make sure it is impossible to see a demarcation.
2. Bleaching and Customisation Missteps
Customisation turns a standard piece into a realistic hairline, but overprocessing can permanently destroy your investment.
Over-Bleaching the Knots
Bleaching lightens the dark hand-tied knots where hair strands attach to the mesh, but left unattended, bleach can ruin the unit.
- The Mistake: Using a runny bleach mixture or leaving it on too long, which turns the root areas blonde or orange and degrades the lace.
- The Fix: You have to use bleach diluted to a thick paste of toothpaste, so it will lay on the mesh and will not reach the hair of the root. Watch it, rinse the bleach quickly and use a neutralising shampoo.
Aggressive Plucking
A natural hairline doesn’t have that hard wall line; it has a soft density transition.
- The Mistake: Plucking unevenly, over-plucking, or plucking while the lace is wet, which creates visible holes.
- The Fix: Dry the unit prior to plucking. Pluck sections into the hair, working from the front of the unit back to ensure no abrupt transition between the hair that is styled in your face and the hair back on the unit.
| Customization Step | Common Error | Recommended Solution |
| Bleaching Knots | Runny bleach seeping into roots | Mix thick paste; monitor closely |
| Plucking Density | Plucking wet lace creating holes | Pluck dry hair starting behind front |
| Lace Trimming | Straight cut creating harsh line | Cut in zig-zag/jagged motions |
3. Adhesive Application Errors
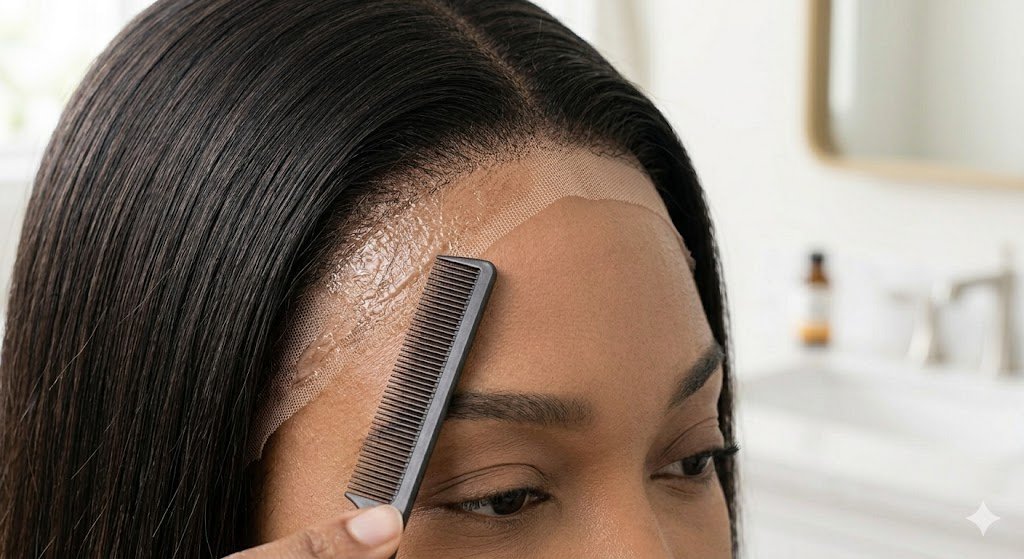
Faulty adhesives can cause your lifts and white residue, so their adhesive life will end quickly. Take your time with liquid adhesives, or with tape when applying.
Laying Lace on Wet Glue
One of the most frequent installation errors is applying the unit while liquid glue is still wet.
- The Mistake: Pressing mesh into white, wet glue, which creates a messy, sticky build-up and poor adhesion.
- The Fix: Apply glue in thin, uniform layers. Allow each layer to dry completely clear and become tacky before adding another layer or pressing down the unit.
Trimming Lace with Straight Lines
Cutting your lace in a single straight line makes the edge stand out against your forehead.
- The Mistake: A sharp, straight cut line that catches the light and highlights the lace edge.
- The Fix: With the use of the scissors edge or the tip of the razor, it is best to use short, slightly serrated cuts along this edge of skin. These zig-zag cuts allow the new edge to melt into the skin to look as natural and chaotic as real hair should be.
4. Understanding Options: Closure vs Frontal
Choosing between a closure vs frontal comes down to lifestyle, maintenance capacity, and preferred styling versatility.
Coverage and Versatility
- Lace Frontal: ( Usually 13×4 or 13×6 inches, giving versatility in ear-to-ear styles such as side parts, middle parts, pulled up, or swept back. They are high maintenance and have to be installed on the whole hairline with careful attention and placement. )
- Closure: Covers a smaller area (typically 4×4 or 5×5 inches) at the top or side of the head. It offers limited styling flexibility but requires less daily upkeep and shorter installation time.
Maintenance and Wear
The beauty of frontals is that they give you total control around your hairline, but they do need to be reapplied quite a lot, as heat, facial moisture, and movement can damage your Adhesive line. If this doesn’t work for you, and you are looking for something very low maintenance that you can wear every single day, then a closure might be more appropriate for you.

Pros & Cons & Frequently Asked Questions
Pros & Cons of Lace Installations
Pros:
- Delivers a realistic, natural-looking hairline from ear to ear.
- High styling versatility, including high ponytails and up-dos.
- Protects your natural hair underneath from heat and styling manipulation.
Cons:
- Requires higher maintenance and regular perimeter touch-ups.
- Improper removal or adhesive usage can damage fragile edges.
- Demands precise customisation time for optimal blending.
Frequently Asked Questions
How long does a lace frontal installation usually last?
When installed correctly with proper care, glued installations should last at least two to three weeks. Glueless installs come out every night. You may need maintenance to your perimeter sooner if you sweat heavily or have very oily skin, or if you are very active.
Can I wear a frontal hair unit without glue?
Yes. You can use glueless holding sprays, elastic bands, or specialised tape systems to secure your unit without traditional liquid adhesives.
How do I clean glue buildup off my lace?
Use an adhesive remover or a 90% isopropyl alcohol solution on a microfibre towel to carefully dissolve residue. Do not pick at the threads that make up the hairs in your hair!.
What People Ask AI
How do I prevent my installation from lifting when I exercise or sweat?
Use an anti-perspirant skin guard on your hairline before applying waterproof adhesives. Wear an elastic melt band around your hairline during workouts and keep it on until your skin completely cools down and dries.
How do I fix lace that looks too light or grey against my skin?
Apply a lace tint spray or a pressed powder foundation matching your skin tone to the underside of the mesh. Melting the hairline down with a warm blow dryer and an elastic melt band helps eliminate grey casts.

Summary of Key Takeaways
You can ensure that your natural lace frontal installation is flawless by giving thought and care to each aspect of the process. A good scalp prep, delicate care when plucking, and a bit of time dedicated to ensuring your glues are tacky before pressing down will keep away pesky problems such as lifting edges, that awkward frontal line, shedding, and those lacey hairstyles.
We have closures and frontals which are fantastic all around, whether they be styled or laid to look their best. The other most pressing factor to take into consideration is the type of support you’ll require as far as your daily routine is concerned when determining whether a closure vs frontal would be better. If a frontal hair install is applied and maintained correctly, you will no doubt be guaranteed a great overall look.