What is Embroidery Digitization? A Vector File Primer for Print on Demand Sellers
If you sell print on demand products and someone just told you your logo needs to be “digitized” before it can go on a hat or a hoodie, you’re probably a bit confused, and that’s completely normal. I remember the first time a client asked me this exact question. She had a beautiful PNG logo, ready for print & assumed it would work fine for embroidery too. It didn’t, and figuring out why sent her down a rabbit hole of file formats she’d never heard of.
What she really needed to know, and what most new POD sellers ask me sooner or later, is how to convert svg to embroidery file format without losing the details that made the design good in the first place. This guide will help you understand everything clearly. Let’s have a look.
What is Embroidery Digitization?
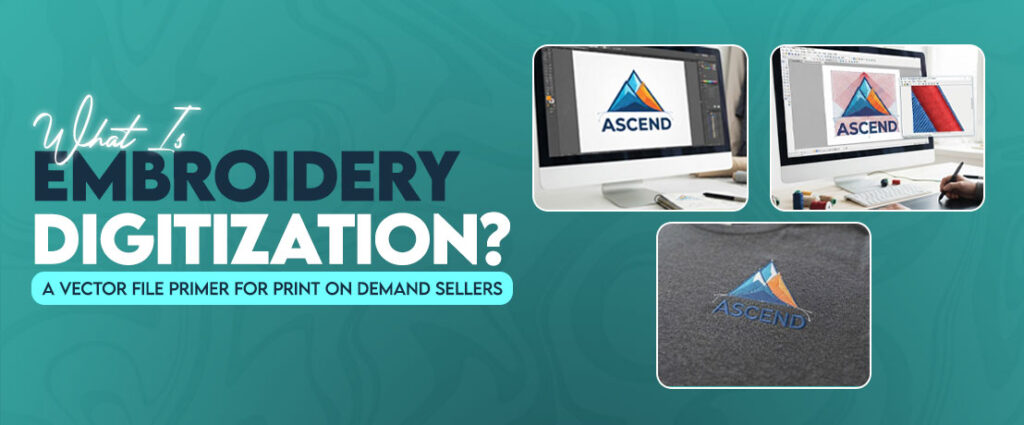
Embroidery digitization is the process of turning a vector image into a set of stitch instructions that an embroidery machine can actually follow. It’s not just a file conversion; it’s more like converting a picture into a language made of needle movements, stitch types, and thread color changes.
A digitizer looks at your artwork and decides:
- Which parts should be satin stitches, fill stitches, or outlines.
- How dense the stitching need to be for the fabric.
- Where the machine should trim thread and switch colors.
- What stitch direction gives the design texture instead of a flat, dull look.
Once that’s mapped out, the software saves it as a machine readable stitch file, and that’s what actually runs through the embroidery machine. Think of the original artwork as the blueprint, and the digitized file as the actual set of building instructions the machine follows step by step.
Why POD Sellers Need to Understand Digitization?
You don’t need to become a digitizer yourself, but knowing the basics saves you from headaches. Sellers who don’t understand this step often end up with:
- Blurry or missing details on the final embroidered product.
- Extra revision rounds that eat into turnaround time.
- Higher costs, since messy source files usually mean more manual cleanup work.
- Designs that look great as a print mockup but fall apart once stitched.
Understanding even a little bit of this process helps you send better files from the start, and that alone can cut your revision requests down quite a bit. I’ve worked with sellers who cut their back and forth emails in half just by sending a clean vector file instead of a screenshot pulled off their own website.
How Embroidery Digitization Works?
From Artwork to Stitch File
The process usually starts with a clean image, ideally a vector file, and moves through a few clear stages. First, the digitizer analyses the design and maps out stitch paths. Then they assign stitch types to different sections, add color change points, and finally export the file into the format your machine needs.
Here’s roughly what that looks like in practice:
- The digitizer imports your source artwork into the software.
- Each shape gets assigned a stitch type, satin for outlines, fill for larger areas.
- Stitch direction and density get set based on the fabric type.
- Color change and trim points get added between sections.
- The design gets tested in a simulation to catch gaps or overlaps.
- The final file gets exported as DST, PES, or whatever your machine needs.
The Role of Digitizing Software
Software like Wilcom, Hatch, or Embird does the heavy lifting here, but it still needs a skilled person guiding it. The software calculates the actual stitch paths based on decisions the digitizer makes, things like density, stitch angle, and underlay. That’s why two digitizers can take the same artwork and produce noticeably different stitch quality. I’ve seen the same logo digitized by two different people, and one version stitched out clean while the other puckered around the edges, purely because of how the underlay was handled.
Common File Formats in Embroidery Digitizing
DST, PES, and Other Machine Formats
Once a design is digitized, it gets saved in a machine format. These formats aren’t interchangeable with your design software files. They come out of the digitizing process itself, not from Illustrator or Canva.
| Format | Created By | Best For | Stores Color Data |
| DST | Tajima | Commercial and industrial machines | No |
| PES | Brother | Home and small business machines | Yes |
| EXP | Melco (adopted by Bernina) | Bernina and Melco machines | Depends on setup |
| JEF | Janome | Janome home machines | Yes |
| VP3 | Pfaff / Husqvarna Viking | Viking and Pfaff machines | Yes |
A quick way to think about it: DST is closer to a universal language that all commercial machines understand, while PES, JEF, and VP3 are more like brand specific dialects built for home machines. If you’re not sure which one you need, check your machine’s manual under “supported file formats,” or just ask any embroiderer to add a few common formats with your order so you’re covered either way.
What is a Vector File?
A vector file for embroidery is built from mathematical paths rather than pixels, which means it can scale up or down without turning blurry. SVG, AI, and EPS are the most common vector formats you’ll run into.
Here’s a quick way to picture it: a raster image, like a JPG or PNG, is a grid of tiny colored squares. Zoom in far enough, and you’ll see the squares themselves. A vector file has none of that. It’s made of shapes and curves defined by math, so it stays sharp no matter how big or small you make it.
- Raster files work well for photos but lose quality when resized.
- Vector files work well for logos, text, and icons, and hold their shape at any size.
Why Vector Files are the Starting Point for Digitizing?
A clean vector source gives the digitizer exact shapes and clear color separations to work from, instead of guessing where one section ends and another begins. This usually means fewer revisions and a cleaner stitch result the first time around.
If you’ve ever wondered, “is svg a vector file,” yes, it is. SVG stores an image as math based paths rather than a pixel grid, and while an embroidery machine can’t read an SVG directly, its clean paths make the best starting point for the digitizer to work from. A messy raster logo, on the other hand, forces the digitizer to guess at edges that were never clean to start with, and that guesswork tends to show up in the final stitch.
What Makes a Design “Digitizing Friendly”
Not every design is equally easy to work with. Digitizing friendly designs tend to have:
- Clear, simple shapes without too much fine detail.
- Text at 0.25 inches or taller, since anything smaller tends to lose readability once stitched.
- A limited color palette, usually around 6 to 8 thread colors.
- Enough contrast between colors so the digitizer can tell one section from another.
- Line widths thick enough to stitch cleanly, roughly 1mm or more.
Fine gradients, thin details, and photo realistic images are the hardest things to convert into thread, so simplifying your design early on saves a lot of back and forth later. A logo that looks stunning as a gradient on screen almost always needs to be flattened into solid color blocks before it can stitch out well.
Choosing Between DIY Digitizing and Professional Services
Some sellers try digitizing software on their own, especially for very simple designs like basic text or single color logos. That can work fine for small, low stakes projects.
Do it yourself if:
- Your design is basic text or a single simple shape.
- You’re comfortable testing and adjusting stitch settings yourself.
- The project isn’t going out to a large batch of customers right away.
Go with a professional if:
- Your design has fine detail, gradients, or small text.
- You’re working on a batch order and can’t afford stitch errors.
- You want the finished product to look consistent across sizes and fabrics.
For anything with real detail, working with actual embroidery digitizing professionals almost always gives a cleaner, more reliable result. A good digitizer knows how to handle stitch direction, density, and fabric behavior in ways that automated tools still struggle with. I’ve tested a fair share of auto digitizing tools over the years, and they’re improving, but they still miss the small judgment calls a trained eye catches instantly.
Tips for POD Sellers Working With Digitized Designs
A few things that consistently save time and money:
- Always start with a vector file when you can, or a very high resolution image if you can’t.
- Keep your color palette simple, since fewer colors usually mean lower digitizing cost and cleaner results.
- Ask your digitizer for a test stitch before running a full batch, especially on a new product type.
- Keep your original digitized file on hand so you’re not paying to redo the same design later.
- Match your file format to your machine brand before placing a bulk order, not after.
Once you get a workflow going, the whole process becomes much less confusing. It really is just a matter of understanding what each file is for and giving your digitizer the cleanest starting point you can.
FAQs
1. What is embroidery digitization in simple terms?
It’s the process of turning a picture into a set of stitch instructions an embroidery machine can follow.
2. Do I need a vector file before digitizing a design?
It’s not always required, but a clean vector file usually leads to some revisions and a better stitch result.
3. Can any image be converted into an embroidery file?
Technically yes, but images with fine detail or gradients need simplifying first for a good outcome.
4. What’s the best embroidery file format for print on demand?
It depends on the machine, but DST and PES cover most commercial and home setups.
5. Should print on demand sellers digitize designs themselves or hire someone?
For simple designs, DIY can work. For detailed logos or artwork, a professional digitizer usually gives better results.
Author BioMatthew DavisSenior Embroidery Digitizer
I’m Matthew Davis, a skilled embroidery digitizer with more than 15 years of practical experience. I specialize in logo digitizing, 3D puff embroidery designs, applique digitizing, custom embroidery digitizing, and working with difficult fabrics. Over the years, I have worked with different fashion brands and production teams worldwide. I always share simple tips and useful techniques to help both beginners and businesses improve their embroidery work.